

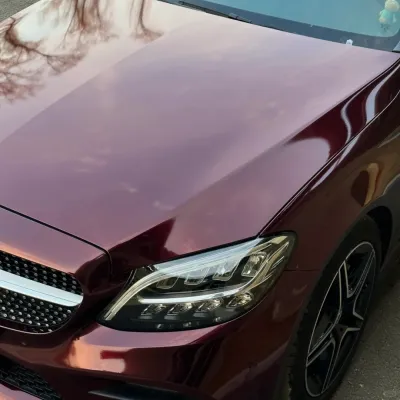
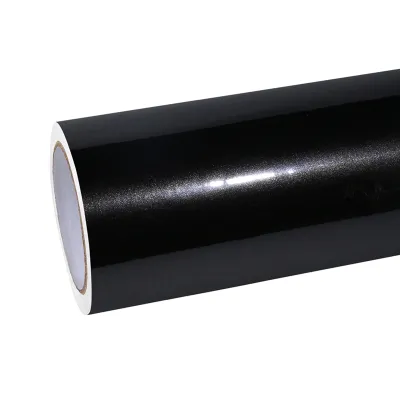
Vinyl wrapping your car hood can be a fun task. You need the right materials to begin. First, pick a good car vinyl wrap that matches your style. The right vinyl makes your car look better and lasts longer. Also, using the right tools helps the wrapping go easier and faster. Did you know the car wrapping business is growing? Many companies are getting more orders. This shows how popular this customization choice has become!
Key Takeaways
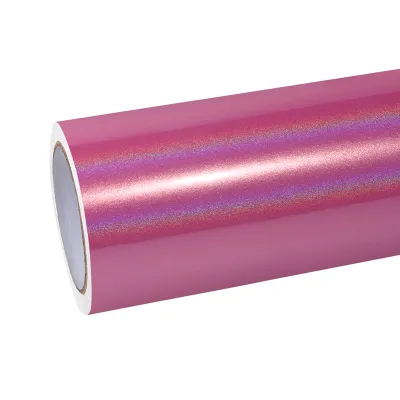
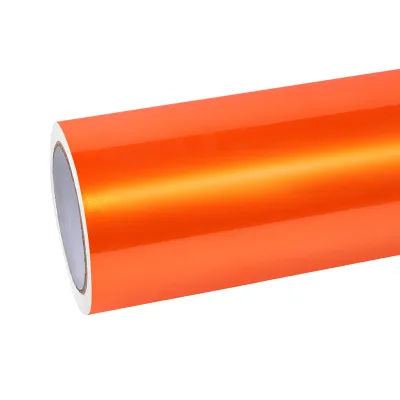
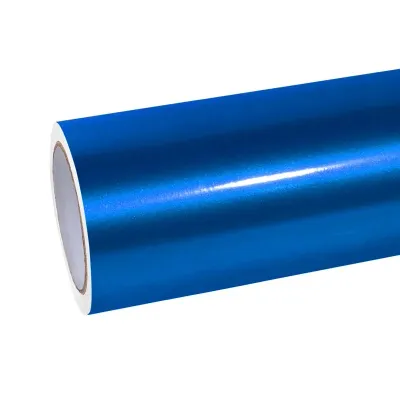
- Pick the right vinyl wrap for your car hood. Option like the Ravoony best carbon fiber wrap is a perfect choice.
- Use important tools like a squeegee, utility knife, and heat gun for a smooth job. These tools help make it look professional.
- Get your car hood ready by cleaning it and taking off old wraps. A clean surface is very important for sticking well.
- Follow steps to put on the vinyl. Take your time to measure, cut, and apply the vinyl carefully for the best look.
- Take care of your vinyl wrap by cleaning it often and keeping it safe from bad weather. Good care can make your wrap last longer.
Essential Vinyl Materials

When you wrap your car hood with vinyl, the materials matter a lot. They affect how your project looks and lasts. Here’s a list of important vinyl materials to think about:
| Vinyl Material | Characteristics | Lifespan |
|---|---|---|
| Cast Vinyl Wraps | High-quality, strong, great UV protection, thin and flexible film | 7 to 10 years |
| Polyurethane Film Wraps | Strong, self-repairing, great against scratches and UV rays | 5 to 8 years |
| Satin and Matte Wraps | Stylish looks, decent durability, needs good care | 5 to 7 years |
| Chrome Wraps | Attention-grabbing, different durability, needs careful handling | 3 to 5 years |
| Carbon Fiber Wraps | Cool look, different durability, gives UV protection | 5 to 7 years |
Each vinyl wrap type has special features. For example, cast vinyl wraps are known for being high-quality and strong. They can handle weather and keep their bright colors for years. If you want something that can fix small scratches, polyurethane film wraps are a great pick. They protect well and keep your car looking nice.
If you want a stylish look, try satin or matte wraps. These give a smooth finish but need extra care to stay nice. On the other hand, chrome wraps make your car shine, but you must handle them carefully to avoid damage. Finally, carbon fiber car wrap gives your car a sporty vibe and protect against UV rays.
You might ask how these materials hold up under pressure. Tests show that good vinyl wraps resist scratches and stay strong over time. For instance, the nano-scratch test checks how well the vinyl handles small scratches. Macro-scratch tests look at its overall strength. This information is important when picking the right vinyl wrap for your car hood.
Types of Car Vinyl Wrap
When it comes to car vinyl wraps, you have several exciting options to choose from. Each type offers unique features and styles that can transform your vehicle's look. Here’s a quick rundown of the most popular types:
-
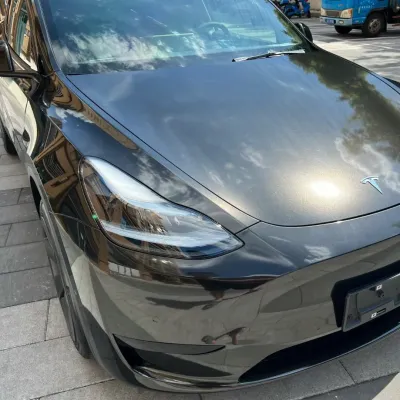
Glossy Car Wrap: This type shines brightly and gives your car a sleek, polished appearance. Glossy wraps are perfect if you want your vehicle to stand out. They reflect light beautifully, making colors appear vibrant and eye-catching.
-
Matte Car Wrap: If you prefer a more understated look, matte wraps might be your best bet. They provide a smooth, non-reflective finish that gives your car a sophisticated vibe. Matte wraps can be a bit tricky to maintain, but they definitely make a statement.
-
Satin Car Wrap: Satin wraps sit somewhere between glossy and matte. They offer a soft sheen that adds depth to your car's color without being overly shiny. This option is great if you want a unique look that’s not too flashy.
-
Carbon Fiber Car Wrap: Want to give your car a sporty edge? Carbon fiber wraps mimic the appearance of real carbon fiber, adding a modern touch. They’re often used on hoods or accents to enhance the overall design.
-
Full Car Wrap: If you're ready to go all out, consider a full car wrap. This option covers your entire vehicle, allowing for complete customization. You can choose any color or finish, making your car truly one-of-a-kind.
Choosing the right type of car vinyl wrap depends on your personal style and how much maintenance you're willing to do. Each option has its perks, so think about what fits your needs best!
Adhesive Properties of Vinyl Wrap
When picking a vinyl wrap for your car hood, knowing about its adhesive properties is very important. The right adhesive helps your wrap stick well and last a long time. Here are some key points to think about:
-
Flexibility and Strength: Vinyl wraps use long-chain polymers like vinyl acetate. These materials make the wrap flexible and strong. This means the wrap can fit your car's curves without ripping. You want a wrap that fits tightly, right?
-
Nano-technology: Some wraps have tiny particles called nano-fillers that help them work better. These small bits improve UV and heat resistance. They help reflect sunlight, which stops the adhesive from breaking down over time. This is especially important if you live in a sunny place.
-
Cross-linking Agents: Chemicals like peroxides create strong links between the polymer chains. This helps the wrap stretch and return to its original shape. You’ll like this when putting on the wrap, as it lets you make changes without hurting the material.
-
Adhesion Promoters: Silane-based substances make the bonding strength of the wrap better. They help the vinyl stick more to your car's surface. Plus, they allow for easy removal when you want to change your wrap.
-
Pressure-Sensitive Adhesives (PSAs): These adhesives stick when you press them. This means you can move the wrap around while applying it. Over time, the bond becomes stronger, making sure your wrap stays put.
Knowing these adhesive properties helps you make a smart choice. A good vinyl wrap not only makes your car look better but also protects it. So, when you're ready to wrap your car hood, remember these points!
Finish Options for Vinyl Car Wrap

When you wrap your car hood, the finish matters a lot. It can change how your car looks. Different finishes have their own styles and how long they last. Here’s a look at the most popular finish options for vinyl car wraps:
-
Glossy Finish: This finish shines bright and makes your car look polished. Glossy wraps reflect light well, making colors stand out. If you want your car to be eye-catching, this is a great choice.
-
Matte Finish: If you like a more simple look, try a matte finish. It has a smooth, non-shiny surface that looks classy. Matte wraps can be harder to care for, but they definitely make an impression.
-
Satin Finish: Satin wraps are between glossy and matte. They have a soft shine that adds depth to your car's color without being too shiny. This option is great if you want something special but not too flashy.
-
Carbon Fiber Finish: Want a sporty look for your car? Carbon fiber wraps look like real carbon fiber and add a modern feel. They are often used on hoods or details to improve the overall design.
-
Chrome Finish: If you want to grab attention, chrome wraps are perfect. They create a shiny effect that’s hard to miss. However, you need to handle them carefully to avoid scratches.
When thinking about durability, it’s important to know how different finishes last over time. Here’s a quick comparison of durability for various vinyl wrap types:
| Vinyl Wrap Type | Durability Characteristics |
|---|---|
| Cast Vinyl | Very durable, great for curves, lasts long without damage |
| Calendared Vinyl | Thicker, less flexible, shorter lifespan due to how it's made |
Choosing the right finish not only makes your car look better but also helps it last longer. So, think about your style and how much care you want to give. With the right finish, your car can look amazing and stay protected for years!
Necessary Tools for Vinyl Wrapping
When you decide to wrap your car hood, having the right tools makes all the difference. Here’s a list of essential tools you’ll need to get started:
-
Squeegee: This handy tool helps you apply the vinyl smoothly. It pushes out air bubbles and ensures the vinyl sticks well to the surface.
-
Utility Knife: A sharp utility knife is crucial for trimming excess vinyl. It allows you to make precise cuts, giving your wrap a clean finish.
-
Heat Gun: This tool helps you conform the vinyl to the curves of your car hood. Heat makes the vinyl more flexible, allowing it to stretch and fit snugly.
-
Measuring Tools: Accurate measurements are key to a successful wrap. Use a tape measure or ruler to ensure you cut the vinyl to the right size.
-
Cleaning Supplies: Before applying the vinyl, you need to clean the surface thoroughly. Use isopropyl alcohol and a microfiber cloth to remove dirt and grease.
Tip: Always work in a clean, dust-free environment. Dust can get trapped under the vinyl, ruining the look of your wrap.
Having these tools on hand will make your vinyl wrapping project smoother and more enjoyable. You’ll feel more confident knowing you have everything you need to achieve a professional-looking finish. So, gather your tools, and get ready to transform your car hood into a stunning masterpiece!
With the right preparation and tools, you’re well on your way to a successful vinyl wrap. Happy wrapping! 🎉
Squeegee for Smooth Application
When you wrap your car hood, using a squeegee is essential for achieving a smooth finish. This handy tool helps you apply the vinyl evenly and eliminates air bubbles. You might wonder why a squeegee is so important. Well, here are a few reasons:
- Reduces Errors: Proper application tools can reduce errors by 40%. This means you’re less likely to make mistakes that could ruin your wrap.
- Prevents Scratches: Using a Wetedge Squeegee helps avoid scratches on the vinyl. You want your car to look perfect, right? A squeegee ensures that the vinyl stays intact during application.
- Improves Quality: A good squeegee improves the overall quality of the vinyl finish. It helps the vinyl adhere better to the surface, giving your car a professional look.
To use a squeegee effectively, start at one edge of the vinyl and work your way across. Apply gentle pressure as you move the squeegee. This pushes out any air bubbles and ensures the vinyl sticks well. If you notice any bubbles forming, don’t panic! Just use the squeegee to push them toward the edges.
Tip: Always keep a microfiber cloth handy. If you accidentally get dirt or dust on the vinyl, you can quickly clean it up without scratching the surface.
Remember, taking your time with the squeegee makes a big difference. Rushing can lead to mistakes, and you want your car to look its best. So, grab your squeegee and get ready to create a smooth, stunning finish on your car hood!
Utility Knife for Precision Cutting
When you wrap your car hood, a utility knife is your best friend for precision cutting. This tool helps you trim excess vinyl and create clean edges. You want your wrap to look professional, right? A sharp utility knife makes all the difference.
Here’s why you should choose a utility knife with a 30-degree blade. This angle is perfect for cutting through vinyl smoothly. The ultra-sharp blade allows you to make precise cuts, especially in tight corners and intricate details. You’ll find that this design enhances your cutting accuracy, giving you the professional-grade finish you desire.
Using a utility knife is simple, but you need to be careful. Here are some tips to help you get the best results:
- Keep it Sharp: Always use a sharp blade. A dull blade can tear the vinyl instead of cutting it cleanly. Replace the blade when it starts to feel less effective.
- Use a Straight Edge: For long cuts, use a straight edge as a guide. This helps you maintain a straight line and prevents mistakes.
- Practice on Scraps: If you’re new to vinyl wrapping, practice cutting on scrap pieces first. This way, you can get a feel for how the knife works without risking your main wrap.
Tip: Always cut away from yourself. This keeps you safe and helps avoid accidents.
With the right utility knife, you can achieve sharp curves and clean lines. The 30-degree blade is specifically designed for delicate cutting jobs, ensuring you get the results you want. So, grab your utility knife and get ready to make those precise cuts that will elevate your vinyl wrapping project! ✂️
Heat Gun for Conforming Vinyl
Using a heat gun is a game-changer when it comes to vinyl wrapping your car hood. This handy tool helps you conform the vinyl to the curves and contours of your vehicle. You might wonder how it works and why it’s so important. Let’s break it down!
First, heat makes the vinyl more flexible. When you warm it up, the material stretches easily, allowing you to fit it snugly around edges and corners. This flexibility is crucial for achieving a smooth, professional finish. If you skip this step, you might end up with wrinkles or bubbles that can ruin the look of your wrap.
Here’s a quick guide on the optimal temperature ranges for using a heat gun during the vinyl wrapping process:
| Application Process | Temperature Range |
|---|---|
| Application | 50°F to 100°F (10°C to 38°C) |
| Removal | Above 130°F (54°C) for clean removal |
When applying the vinyl, keep the heat gun at a safe distance. You don’t want to scorch the vinyl or damage your car’s paint. Move the heat gun back and forth to distribute the heat evenly. This technique helps prevent hot spots that could lead to bubbling.
Tip: Always wear protective gloves when using a heat gun. The heat can be intense, and you want to keep your hands safe while you work.
After you’ve applied the vinyl, you can use the heat gun to help it adhere better. Gently heat the edges and corners, pressing the vinyl down as you go. This step ensures a tight fit and helps the vinyl last longer.
Measuring Tools for Accurate Sizing
When you wrap your car hood, measuring correctly is very important. You want your vinyl to fit just right, right? Using the right tools can really help. Here are some tools you should think about:
-
Tape Measure: A flexible tape measure is super helpful. It helps you find the exact size of your car hood. Be sure to measure both the width and length to avoid surprises later.
-
Ruler or Straight Edge: For straight cuts, a ruler or straight edge is great. It helps you cut the vinyl evenly for a clean look.
-
Calipers: If you need to measure small details or curves, calipers are perfect. They give you exact measurements, especially for tricky spots.
-
Chalk Line: This tool helps you draw straight lines on your car hood. It’s useful if you want to align patterns or seams in your vinyl.
Using these tools can really make your wrapping easier. Did you know that measuring correctly can cut errors by up to 40%? That’s a big deal! Here’s why measuring tools matter:
- Calculating Dimensions: You need to know the size of your car hood to see how much vinyl you’ll need.
- Checking Sizes: Before cutting, make sure each piece fits your car well.
- Spacing for Edges: Leave enough space around the edges for a neat finish.
- Aligning Patterns: If your vinyl has a design, good measurements help you line it up right.
- Measuring for Obstacles: You’ll need to cut the vinyl around things like emblems or vents.
By using these measuring tools, you set yourself up for success. So, grab your tape measure and get ready to make those precise measurements. You’ll be one step closer to that amazing vinyl wrap! 📏✨
Preparing Your Car Hood
Before you start wrapping your car hood, you need to prepare it properly. A well-prepared surface makes a huge difference in how your vinyl wrap looks and lasts. Here are some essential steps to follow:
-
Clean the Surface Thoroughly: Start by washing the hood with soap and water. This removes dirt and grime. After washing, wipe it down with a microfiber cloth to get rid of any remaining contaminants. A clean surface helps the vinyl stick better.
-
Remove Any Wax or Grease: Next, use an alcohol-based cleaner or degreaser. This step is crucial because invisible residues can weaken the adhesion of the vinyl. You want to ensure that nothing stands in the way of a strong bond.
-
Smooth Out Imperfections: Take a close look at your hood. If you spot any scratches or dents, use fine-grit sandpaper or body filler to smooth them out. A flawless surface is key to achieving a professional finish.
-
Tape Off the Edges: Use masking tape to outline the edges of your hood. This not only gives you clean edges but also serves as a guide for trimming the vinyl later. It’s a simple trick that can elevate your wrapping game.
Tip: Always work in a clean, dust-free environment. Dust can get trapped under the vinyl, ruining the look of your wrap.
By following these steps, you set yourself up for success. Proper preparation ensures that your vinyl wrap adheres well and looks fantastic. So, take your time with these tasks, and you’ll be ready to create a stunning transformation for your car hood! 🚗✨
Cleaning the Surface for Vinyl Wrap
Before you apply your vinyl wrap, you need to clean the surface thoroughly. A clean surface helps the vinyl stick better and ensures a smooth finish. Here’s how you can do it step by step:
-
Wash the Hood: Start by washing your car hood with soap and water. Use a soft sponge to remove dirt and grime. Rinse it well to get rid of any soap residue.
-
Dry the Surface: After washing, dry the hood with a microfiber cloth. This prevents water spots and prepares the surface for the next steps.
-
Use an Alcohol-Based Cleaner: Grab an alcohol-based cleaner or degreaser. Spray it on the surface and wipe it down with a clean microfiber cloth. This step is crucial because it removes any wax or grease that could interfere with the vinyl's adhesion.
-
Inspect for Imperfections: Take a close look at your hood. If you see any scratches or dents, fix them before moving on. You can use fine-grit sandpaper to smooth out rough spots. A flawless surface is key to achieving a professional finish.
-
Final Wipe Down: Give the hood one last wipe with a clean cloth. This ensures that no dust or debris remains.
Tip: Always work in a clean, dust-free environment. Dust can get trapped under the vinyl, ruining the look of your wrap.
By following these steps, you set yourself up for success. Cleaning the surface properly makes a big difference in how your vinyl wrap looks and lasts. So, take your time with this process, and you’ll be ready to create a stunning transformation for your car hood! 🚗✨
Removing Old Wraps or Paint
Before you can apply a new vinyl wrap, you need to remove any old wraps or paint. This step is crucial for ensuring that your new wrap adheres properly. Here’s how you can do it effectively:
-
Gather Your Supplies: You’ll need a few tools to get started:
- Heat gun
- Plastic scraper or squeegee
- Adhesive remover
- Clean cloths
- Gloves for protection
-
Heat the Vinyl: Use the heat gun to warm up the old vinyl wrap. Hold it about 6 inches away from the surface. The heat makes the adhesive softer, which helps you peel it off more easily.
-
Peel Off the Vinyl: Start at one corner and gently lift the vinyl. Use the plastic scraper to help if needed. Be careful not to scratch the paint underneath. If the vinyl doesn’t come off easily, apply more heat.
-
Remove Residual Adhesive: After you’ve taken off the vinyl, you might find some sticky residue left behind. Apply adhesive remover to a clean cloth and rub it on the residue. This will help break it down.
-
Clean the Surface: Once you’ve removed all the adhesive, clean the surface again with soap and water. This ensures that no leftover chemicals interfere with your new wrap.
Tip: Always work in a well-ventilated area when using a heat gun or adhesive remover. Safety first!
By following these steps, you’ll prepare your car hood for a fresh new look. Taking the time to remove old wraps or paint properly will make your vinyl application smoother and more successful. Happy wrapping! 🎉
Ensuring a Smooth Surface for Application
Before you put on your vinyl wrap, a smooth surface is very important. A good surface helps the vinyl stick better and last longer. Here’s how to get that smooth finish:
-
Check the Surface: First, look at your car hood for any problems. Check for scratches, dents, or rust. These issues can affect how well the vinyl sticks.
-
Smooth Out Rough Areas: If you see any rough spots, use fine-grit sandpaper to make them smooth. This helps create an even surface for the vinyl to stick to.
-
Apply a Primer: Using a primer can help fill in small flaws. It makes a flat surface that helps the vinyl stick better. Let the primer dry completely before you continue.
-
Clean Well: After preparing the surface, clean it again. Use isopropyl alcohol and a microfiber cloth to wipe away dust or grease. A clean surface is key for good sticking.
-
Think About Getting Help: If you’re not sure about preparing the surface, consider asking a pro for help. They can fix any weak spots, making your wrap last longer.
Tip: A smooth surface is key for the vinyl wraps to stick well. It helps stop peeling or wear, so your wrap looks good for years.
By taking time to prepare your car hood right, you set yourself up for success. A smooth surface not only makes your wrap look better but also helps it last longer. So, get ready and make that hood look amazing! 🚗✨
Step-by-Step Vinyl Application
Applying a vinyl wrap to your car hood can seem daunting, but with a clear step-by-step guide, you can achieve a flawless wrap. Let’s break down the process into manageable steps to help you get started.
-
Preparation: Start by ensuring your workspace is clean and organized. The ideal temperature for vinyl application is between 16-23°C (60-73°F). This range helps the vinyl adhere better and makes it easier to work with.
-
Measuring and Cutting: Measure your car hood carefully. You want to cut the vinyl slightly larger than the hood itself. This extra material allows for adjustments during application.
-
Cleaning: Use a car cleaning solution and a clay bar to prepare the surface. This step removes dirt, grease, and contaminants that could affect adhesion. A clean surface is crucial for a successful application.
-
Applying Slip Solution: Lightly coat the surface with a slip solution. This mixture of water and a few drops of dish soap helps the vinyl move around during application. It makes positioning the vinyl much easier.
-
Vinyl Application: Divide the hood into sections. Start applying the vinyl from one edge, gradually working your way across. Use a heat gun to warm the vinyl as you go. This heat makes the vinyl more flexible, allowing it to conform to the curves of your hood. Use a squeegee to push out air bubbles and ensure a tight fit.
-
Trimming: Once the vinyl is applied, carefully trim any excess material. Use a sharp utility knife for a flush cut along the edges. This step is essential for a clean and professional look.
-
Finishing Touches: Inspect your work for any bubbles or wrinkles. If you find any, apply heat to those areas and use the squeegee to smooth them out. This final inspection ensures that your wrap looks perfect.
By following these steps, you can confidently apply the vinyl wrap to your car hood. Remember, patience is key. Take your time, and don’t rush through the process. With practice, you’ll master the art of car wrap installation!
How to Wrap a Car Hood: Measuring and Cutting
Measuring and cutting your vinyl wrap accurately is crucial for a successful application. You want your car hood to look perfect, right? Here’s how to do it step by step.
-
Gather Your Tools: Start with a flexible measuring tape or string. These tools help you measure curved areas easily. You’ll also need a sharp utility knife for cutting and a straight edge for clean lines.
-
Measure the Hood: Begin by measuring the length and width of your car hood. Don’t forget to measure key areas like the roof, doors, and fenders. Record all measurements clearly to avoid mistakes later.
-
Add Extra Material: Always add a few extra inches to your measurements. This extra material allows for overlaps and mistakes. It’s essential to have enough vinyl for neat edge tucking. You don’t want to run short halfway through!
-
Calculate Total Area: To figure out how much vinyl you need, multiply the length by the width. This calculation gives you the total area of the hood. Remember to factor in waste for overlaps and mistakes.
-
Order More Vinyl: It’s a good idea to order slightly more vinyl than you think you’ll need. Having extra material on hand can save you from potential headaches if you make a mistake.
-
Cut the Vinyl: Once you have your measurements, lay the vinyl flat on a clean surface. Use your straight edge and utility knife to cut the vinyl according to your measurements. Make sure to cut slowly and carefully for the best results.
By following these steps, you’ll be well on your way to mastering how to wrap a car hood. Accurate measuring and cutting set the foundation for a stunning vinyl wrap that enhances your vehicle's appearance!
Applying the Vinyl Car Wrap
Now that you’ve prepared your car hood and cut your vinyl, it’s time to apply the wrap! This step can be exciting, and with a little patience, you’ll achieve a professional-looking finish. Here’s how to do it:
-
Position the Vinyl: Start by laying the vinyl over the hood. Make sure it covers the entire area. Don’t worry about getting it perfect right away; you can adjust it as needed.
-
Use the Slip Solution: Lightly spray a slip solution on the surface of the hood and the back of the vinyl. This mixture of water and a few drops of dish soap helps the vinyl slide into place. It makes positioning much easier!
-
Start Applying: Begin at one edge of the hood. Slowly press the vinyl down while using your squeegee to push out air bubbles. Work your way across the surface, applying even pressure.
-
Heat as You Go: Use your heat gun to warm the vinyl. This step is crucial for conforming the wrap to the curves of your hood. Keep the heat gun about 6 inches away to avoid damaging the vinyl.
-
Smooth Out Bubbles: If you notice any bubbles, don’t panic! Just use the squeegee to push them toward the edges. If they’re stubborn, apply a little heat to help release them.
-
Trim the Edges: Once the vinyl is applied smoothly, use your utility knife to trim any excess material. Be careful to cut along the edges for a clean finish.
Tip: Take your time during this process. Rushing can lead to mistakes, and you want your car to look its best!
By following these steps, you’ll successfully apply your vinyl wrap. Enjoy the transformation of your car hood, and get ready to show off your hard work! 🚗✨
Smoothing Out Bubbles in the Vinyl
When you apply vinyl to your car hood, you might notice some pesky bubbles forming. Don’t worry! Smoothing out bubbles is a common part of the wrapping process. Here’s how you can tackle those bubbles and achieve a flawless finish.
-
Use a Squeegee: Start with your trusty squeegee. This tool helps push air out from under the vinyl. Begin at the center of the bubble and work your way to the edges. Apply gentle pressure to avoid damaging the vinyl.
-
Apply Heat: If the bubbles are stubborn, grab your heat gun. Warm the area around the bubble for a few seconds. The heat makes the vinyl more flexible, allowing you to smooth it out easily. Just remember to keep the heat gun at a safe distance to avoid melting the vinyl.
-
Create a Small Pin Hole: If a bubble refuses to budge, you can use a sharp utility knife to create a tiny pinhole. This allows trapped air to escape. After you make the hole, use the squeegee to push the air out. Be careful not to cut too deep; you don’t want to damage the vinyl.
-
Keep the Surface Clean: Dust and dirt can make bubbles worse. Always work in a clean environment. Before applying the vinyl, make sure the surface is spotless. This helps prevent air pockets from forming in the first place.
-
Consider Techniques from the Experts: Some advanced techniques can help reduce bubble formation. For instance, optimizing channel structures and using fluid sealing can minimize air intrusion. These methods are often used in professional settings but can inspire your DIY approach.
By following these steps, you can effectively smooth out bubbles and achieve a stunning wrap on your car hood. Remember, patience is key. Take your time, and soon enough, you’ll have a beautifully wrapped hood that turns heads!
Trimming Excess Vinyl for a Clean Finish
After you’ve applied your vinyl wrap, it’s time to trim the excess material. This step is crucial for achieving a clean and professional finish. Here’s how to do it right:
-
Gather Your Tools: You’ll need a sharp utility knife and a straight edge. These tools help you make precise cuts along the edges of your hood.
-
Identify the Edges: Look closely at where the vinyl overlaps the edges of your car hood. You want to trim just enough to create a neat line without cutting too deep.
-
Start Trimming: Place the straight edge along the edge of the hood. Use it as a guide while you cut. This technique helps you maintain a straight line. Remember to cut slowly and carefully. Rushing can lead to mistakes.
-
Wrap Around Edges: As you trim, make sure to wrap around edges smoothly. This ensures that the vinyl adheres well and looks seamless. If you notice any excess vinyl sticking out, trim it away gently.
-
Inspect Your Work: After trimming, take a step back and look at your work. Check for any uneven edges or areas that need a little more attention. If you find any imperfections, don’t hesitate to go back and fix them.
-
Final Touches: Once you’re satisfied with the trim, give the edges a gentle press to ensure they stick well. This final step helps prevent peeling and keeps your wrap looking fresh.
By following these steps, you’ll achieve a clean finish that enhances the overall look of your car hood. Happy wrapping!
Post-Wrapping Maintenance
Once you’ve wrapped your car hood, keeping it in great shape is essential. Proper maintenance can help your vinyl wrap last longer and look fantastic. Here are some tips to keep your wrap looking fresh:
-
Regular Cleaning: Clean your wrap regularly with gentle products. Use a soft cloth and a mild soap solution. This helps remove dirt and grime without damaging the vinyl. A vehicle owner who followed these cleaning techniques reported that their wrap stayed vibrant for over six years!
-
Protect from the Elements: Shield your wrap from harsh weather and UV rays. Whenever possible, park in the shade or use a car cover. This simple step can prevent fading and keep your long-lasting wrap looking new.
-
Avoid Common Mistakes: Don’t use abrasive cleaners or scrubbers. These can scratch the surface and ruin the finish. Instead, stick to soft materials that won’t harm the vinyl.
-
Handle Repairs Carefully: If you notice any damage, address it quickly. Use a heat gun to help re-adhere any lifting edges. This keeps your wrap looking neat and prevents further issues.
-
Maintain Strong Adhesion: Ensure that the edges of your wrap stay down. If you see any lifting, press them back down gently. This helps maintain the wrap's appearance and durability.
By following these maintenance tips, you can enjoy your vinyl wrap for years to come. Remember, a little care goes a long way in keeping your car hood looking sharp!
Cleaning Your Wrapped Hood
Keeping your vinyl-wrapped hood clean is essential for maintaining its appearance and longevity. You want your car to look sharp, right? Here’s how to clean your vehicle's hood without damaging the wrap.
-
Gather Your Supplies: Start with a few basic items:
- A soft microfiber cloth
- A bucket of warm water
- A mild car soap
- A hose or a spray bottle for rinsing
-
Wash Gently: Mix the mild car soap with warm water in your bucket. Dip your microfiber cloth into the soapy water and gently wipe down the hood. Avoid using abrasive sponges or brushes, as they can scratch the vinyl.
-
Rinse Thoroughly: After washing, rinse the hood with clean water. You can use a hose or a spray bottle. Make sure to remove all soap residue, as it can leave streaks on the vinyl.
-
Dry Carefully: Use a clean microfiber cloth to dry the hood. Pat the surface gently instead of rubbing it. This helps prevent scratches and keeps the wrap looking fresh.
-
Avoid Harsh Chemicals: Stay away from strong cleaners, waxes, or polishes. These products can damage the vinyl and ruin its finish. Stick to gentle soap and water for the best results.
Tip: Regular cleaning helps prevent dirt buildup and keeps your wrap looking new. Aim to clean your vehicle's hood every couple of weeks, especially if you drive in dusty or dirty conditions.
By following these steps, you can keep your wrapped hood looking fantastic for years to come. A little care goes a long way in preserving that stunning finish!
Protecting the Vinyl from Damage
Once you’ve wrapped your car hood, protecting that beautiful vinyl is key to keeping it looking fresh. Here are some practical tips to help you safeguard your wrap from damage:
-
Avoid Harsh Chemicals: When cleaning your wrapped hood, stick to mild soap and water. Strong cleaners can break down the vinyl and ruin its finish.
-
Park Smart: Whenever possible, park your car in a garage or shaded area. Direct sunlight can fade the colors and weaken the adhesive over time. If you can’t find shade, consider using a car cover.
-
Be Careful with Tools: If you’re working on your car, be cautious with tools and equipment. Avoid dragging anything across the hood that could scratch or tear the vinyl.
-
Watch Out for Debris: Road debris can cause scratches and dents. Try to avoid driving on rough roads or in areas with lots of loose gravel.
-
Regular Inspections: Check your wrap regularly for any signs of damage. If you spot any lifting edges or small tears, address them quickly. Use a heat gun to re-adhere any lifting areas.
Tip: If you notice any scratches, don’t panic! Many vinyl wraps have self-healing properties. Applying heat can help the vinyl return to its original state.
By following these tips, you can keep your vinyl wrap looking sharp for years to come. Remember, a little care goes a long way in preserving that stunning finish! 🚗✨
Fixing Small Damage to Vinyl Wrap
Even with good care, your vinyl wrap might get some small damage over time. Don’t worry! You can fix these problems easily and keep your car looking great. Here’s how to handle common issues:
-
Cleaning: Start by cleaning the damaged spot. Use special car cleaners and a microfiber cloth. This step removes dirt and grime, helping you see the damage better and get ready for repairs.
-
Color Boosters: If your wrap looks dull, try using color boosters. Apply them evenly in small areas and buff gently. This can bring back the bright look of your wrap, making it shine again.
-
Heat Fix: For tiny wrinkles or bubbles, using heat can help. Use a heat gun on a low setting to warm the area. This makes the adhesive work again, allowing the vinyl to go back to its original shape. Just be careful not to overheat the vinyl!
-
Protective Coatings: After fixing the damage, protect your wrap with a good sealant. Look for one that has UV protection and water-repelling features. This extra layer helps keep your wrap safe from future damage and looking fresh.
Here’s a quick summary of these methods:
| Method | Description |
|---|---|
| Cleaning | Use special car cleaners and microfiber cloths to clean the wrap surface well. |
| Color Boosters | Apply color boosters evenly in small areas and buff gently to bring back shine. |
| Heat Fix | Use heat to reactivate the adhesive and restore the wrap’s original shape. |
| Protective Coatings | Protect the wrap with a good sealant that has UV protection and water-repelling features. |
By following these steps, you can easily fix small damage to your vinyl wrap. Remember, a little care goes a long way in keeping your car looking its best! So, don’t hesitate to give your wrap some attention when it needs it. 🚗✨
Wrapping your car hood can be a fun way to customize your vehicle. You’ve learned about important materials like vinyl wraps and tools like squeegees and heat guns. Now, it’s time to start your car wrap project!
Remember, vinyl wrapping is a great choice instead of a permanent paint job. It lets you show off your style while keeping your car safe. So, gather your supplies and begin your vehicle customization adventure today!
FAQ
What is vinyl wrapping?
Vinyl wrapping is a process where you cover your car's surface with a thin layer of vinyl material. This method allows you to change your vehicle's appearance without a permanent paint job.
How long does a vinyl wrap last?
A vinyl wrap can last anywhere from 3 to 10 years, depending on the quality of the vinyl and how well you maintain it. Proper care can significantly extend its lifespan.
Can I remove the vinyl wrap myself?
Yes, you can remove the vinyl wrap yourself. Use a heat gun to soften the adhesive, then carefully peel it off. Make sure to clean any leftover residue afterward.
Is vinyl wrapping safe for my car's paint?
Absolutely! Vinyl wraps protect your car's original paint from UV rays and scratches. When removed properly, they won't damage the underlying paint, keeping your vehicle looking great.
Can I wash my wrapped car?
Yes, you can wash your wrapped car! Use a mild soap and a soft cloth. Avoid automatic car washes with brushes, as they can scratch the vinyl. Regular cleaning helps maintain its appearance.


0 Comments